前言
本次实验利用three.js实现phong材质【之前在GAMES202作业0里也接触过phong shader的glsl版本】,算法部分不难理解,本次遇到的困难主要在于不熟悉three.js的shader接口【就像unity shaderlab里会有一些专门的变量供用户调用用于顶点、法线等计算】,之后会分析three.js的ShaderMaterial的坑。
项目工程:here
结果图
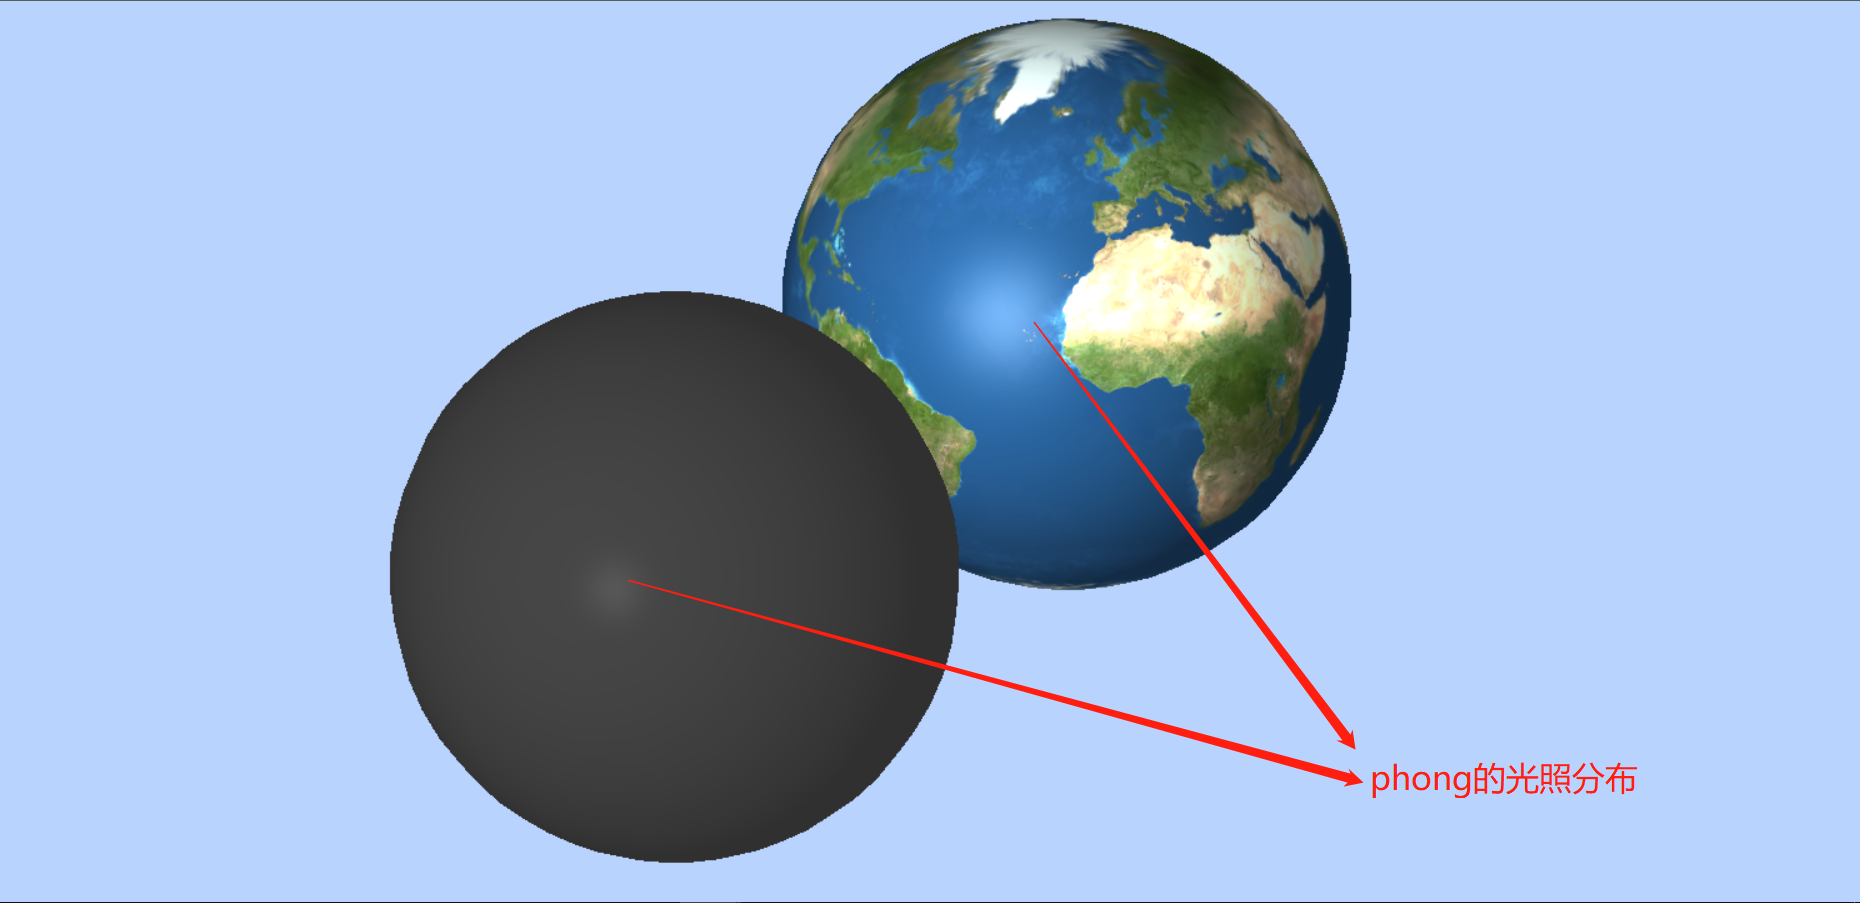
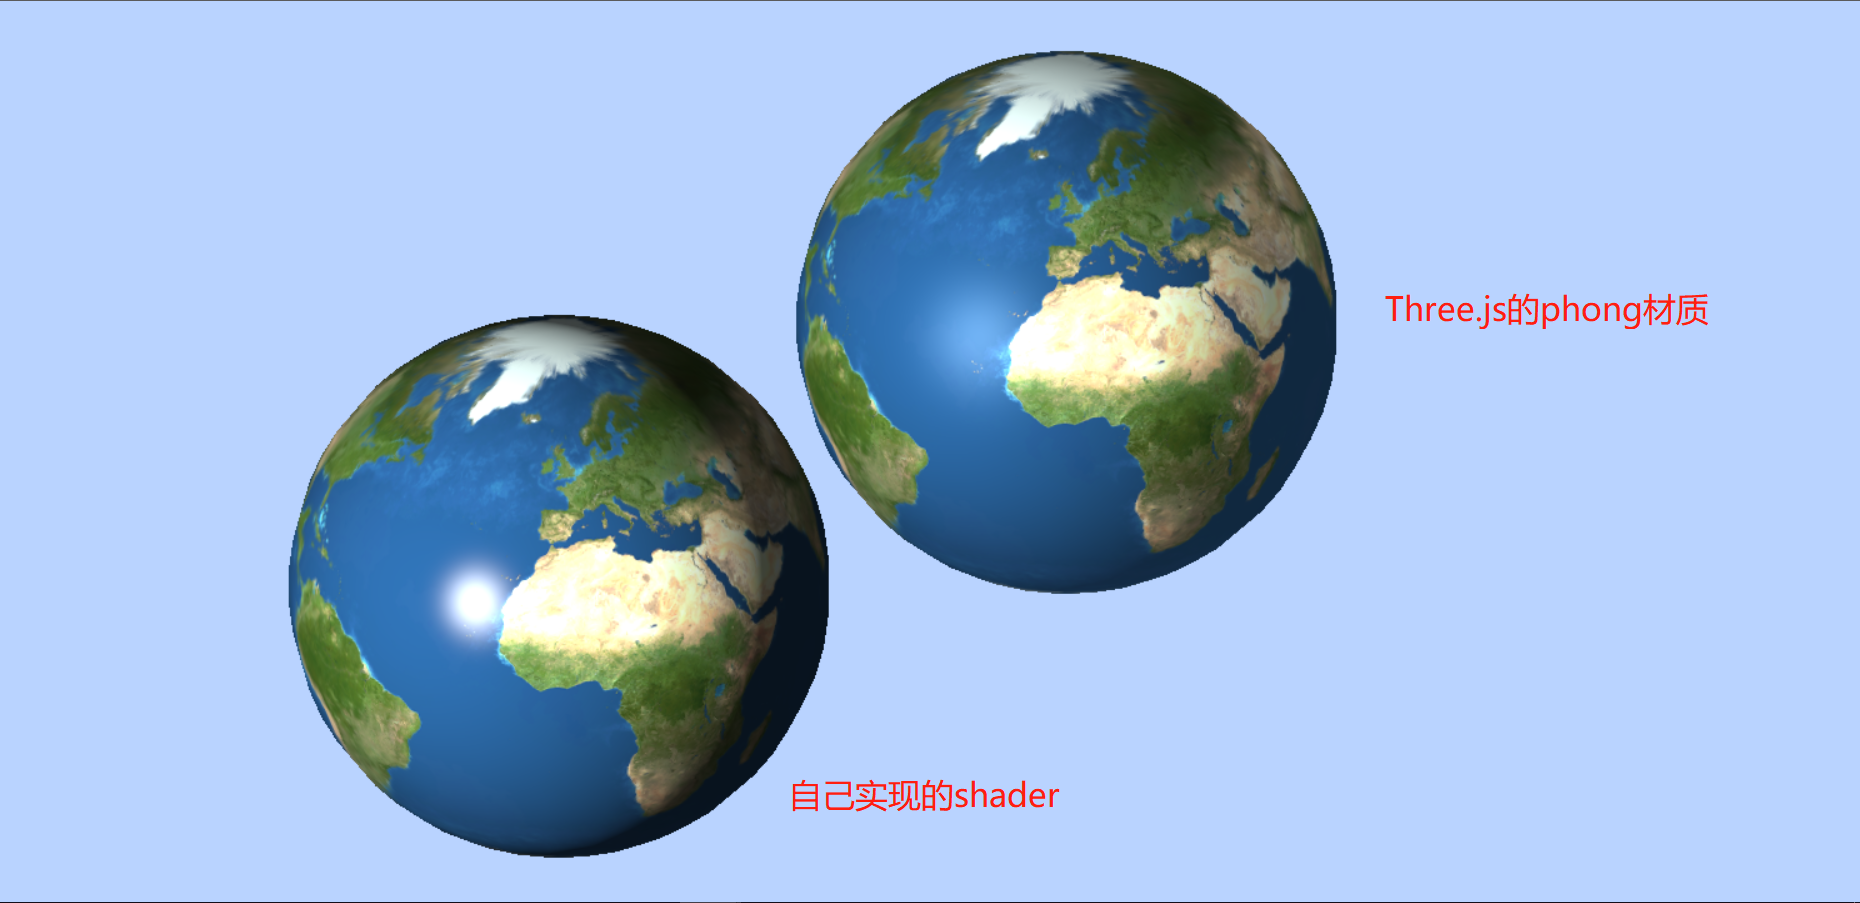
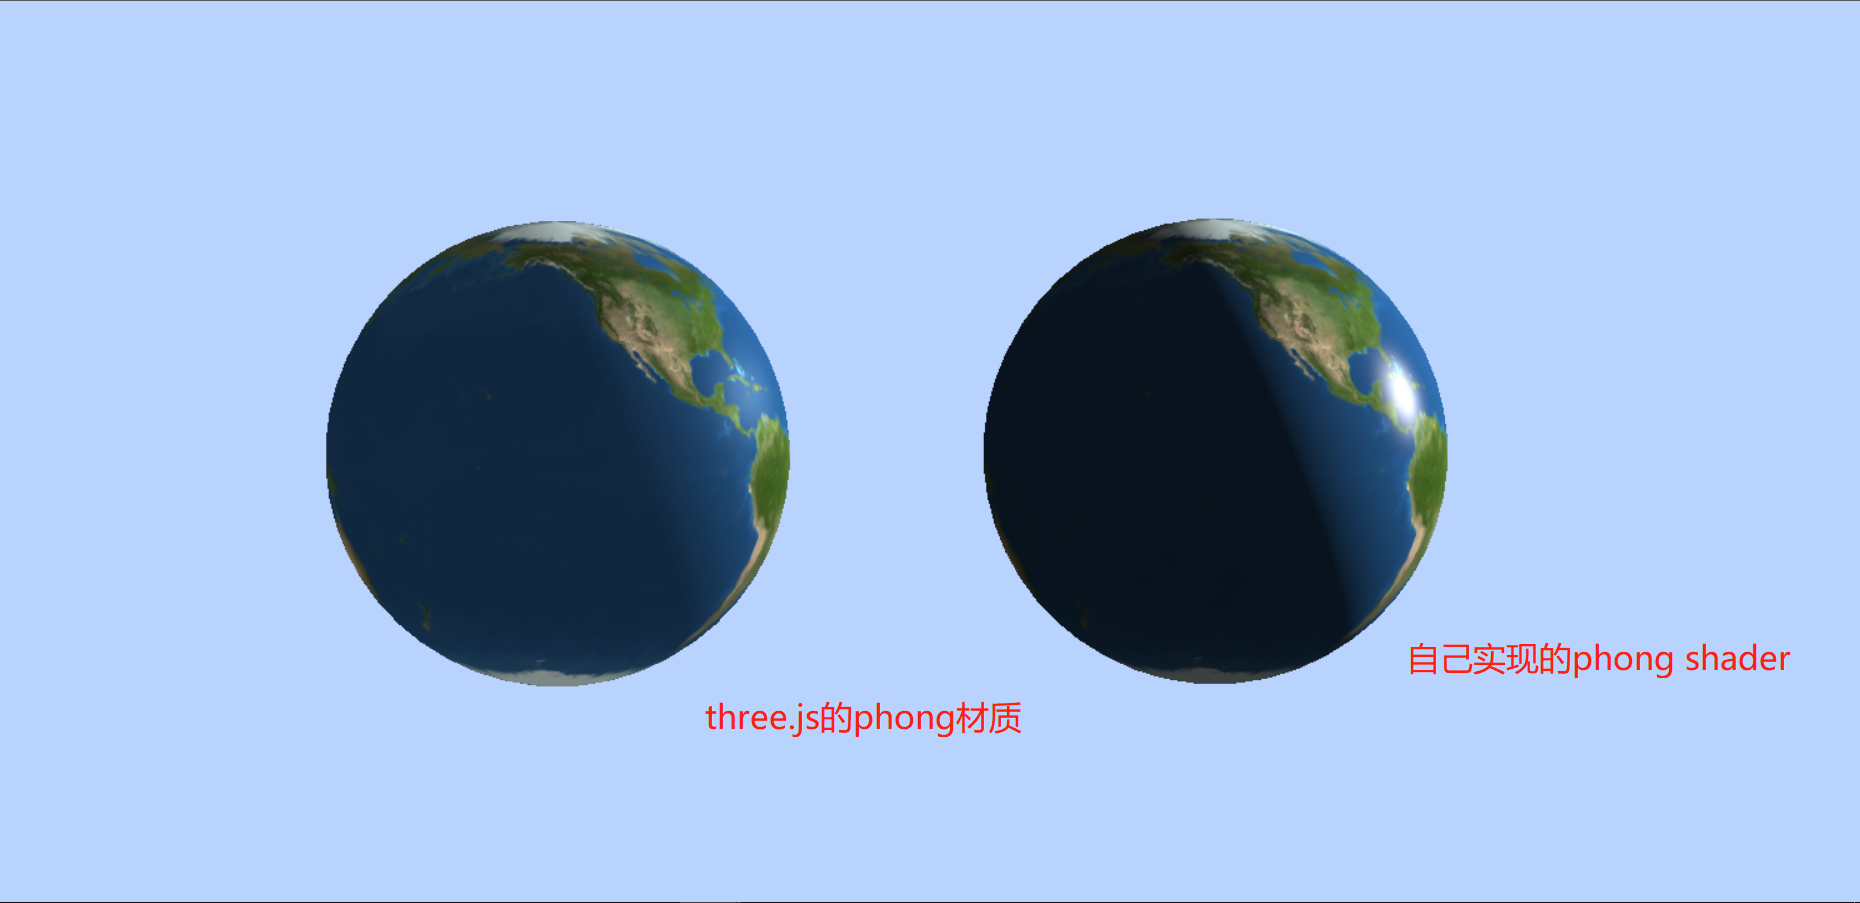
代码
uniform
    var uniforms;
    uniforms = {
      uSampler: {//采样的图片
        value: texture,
      },
      uTextureSample: {//采样选择 1为贴图 2为不带贴图
        value: 1
      },
      uKd: {
        value: new THREE.Vector3(0.05, 0.05, 0.05)//控制满反射系数
      },
      uKs: {
        value: new THREE.Vector3(0.5, 0.5, 0.5)//控制高光系数
      },
      lightPosition: {//光源位置
        value: point.position
      },
      uLightIntensity: {
        value: 1155.0//光照强度
      }
    };
    var material_raw = new THREE.ShaderMaterial({
      uniforms: uniforms,
      vertexShader: document.getElementById('vertexShader').textContent,
      fragmentShader: document.getElementById('fragmentShader').textContent,
    });
顶点着色器
  <script id="vertexShader" type="x-shader/x-vertex">
    attribute vec3 aNormalPosition;
    attribute vec2 aTextureCoord;
    varying highp vec2 vTextureCoord;
    varying highp vec3 vFragPos;
    varying highp vec3 vNormal;
    /*
    normal,position以及摄像机位置需要使用three.js内置参数
    */

    void main(void) {

      vFragPos = position;
      vNormal = normal;
      gl_Position = projectionMatrix * modelViewMatrix * vec4(position, 1.0);
      vTextureCoord = uv;

    }
</script>
片元着色器
  <script id="fragmentShader" type="x-shader/x-fragment">
    #ifdef GL_ES
    precision mediump float;
    #endif
    uniform sampler2D uSampler;
    uniform vec3 uKd;
    uniform vec3 uKs;
    uniform vec3 lightPosition;
    uniform float uLightIntensity;
    uniform int uTextureSample;

    varying highp vec2 vTextureCoord;
    varying highp vec3 vFragPos;
    varying highp vec3 vNormal;

    void main(void) {
      vec3 color;
      if (uTextureSample == 1) {
        color = pow(texture2D(uSampler, vTextureCoord).rgb, vec3(2.2));
      } else {
        color = uKd;
      }


      vec3 ambient = 0.05 * color;

      vec3 lightDir = normalize(lightPosition - vFragPos);
      vec3 normal = normalize(vNormal);
      float diff = max(dot(lightDir, normal), 0.0);
      float light_atten_coff = uLightIntensity / length(lightPosition - vFragPos);
      vec3 diffuse =  diff * light_atten_coff * color;

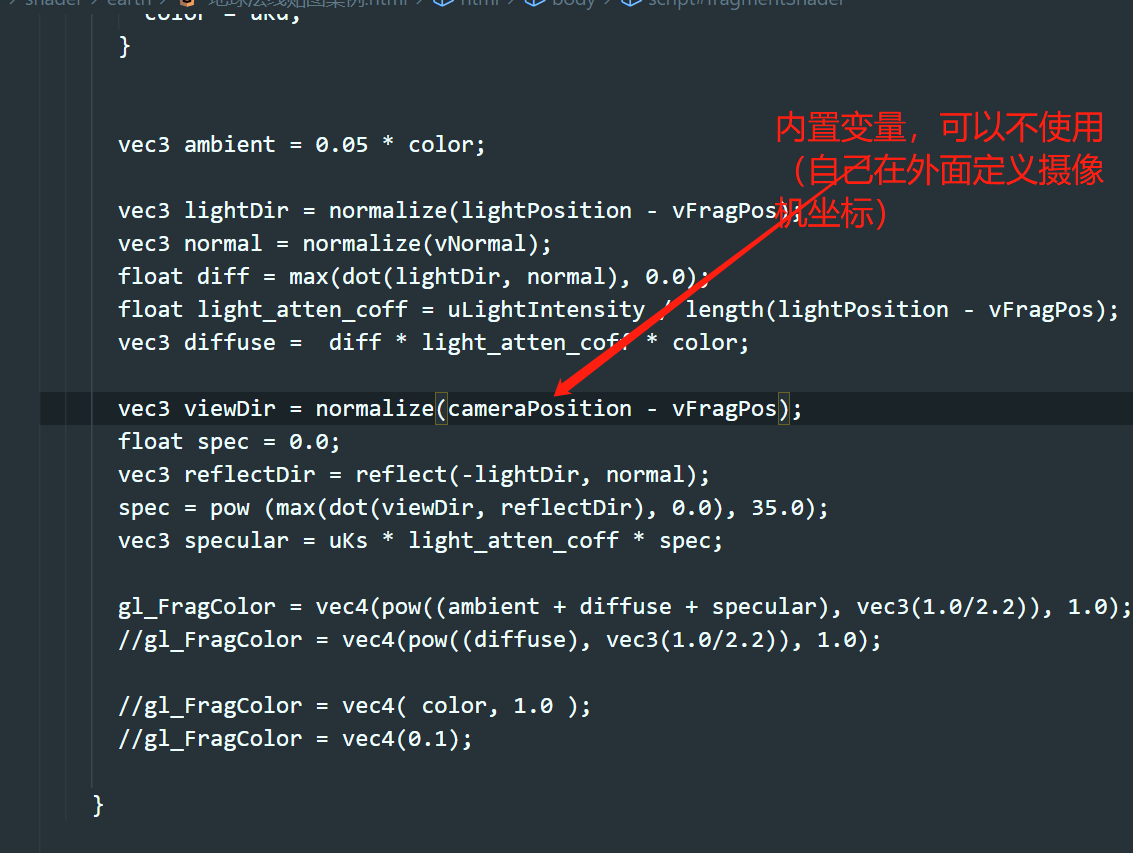
      vec3 viewDir = normalize(cameraPosition - vFragPos);
      float spec = 0.0;
      vec3 reflectDir = reflect(-lightDir, normal);
      spec = pow (max(dot(viewDir, reflectDir), 0.0), 35.0);
      vec3 specular = uKs * light_atten_coff * spec;

      gl_FragColor = vec4(pow((ambient + diffuse + specular), vec3(1.0/2.2)), 1.0);
      //gl_FragColor = vec4(pow((diffuse), vec3(1.0/2.2)), 1.0);

      //gl_FragColor = vec4( color, 1.0 );
      //gl_FragColor = vec4(0.1);

    }
</script>
总代码
<!DOCTYPE html>
<html lang="en">

<head>
  <meta charset="UTF-8">
  <title>源码对应电子书:百度"three.js 郭隆邦"</title>
  <style>
    body {
      margin: 0;
      overflow: hidden;
      /* 隐藏body窗口区域滚动条 */
    }
  </style>
  <!--引入three.js三维引擎-->
  <script src="http://www.yanhuangxueyuan.com/versions/threejsR92/build/three.js"></script>
  <!-- 引入threejs扩展控件OrbitControls.js -->
  <script src="http://www.yanhuangxueyuan.com/versions/threejsR92/examples/js/controls/OrbitControls.js"></script>
</head>

<body>
  <!--**********************Shader程序***************************-->

  <script id="vertexShader" type="x-shader/x-vertex">
    attribute vec3 aNormalPosition;
    attribute vec2 aTextureCoord;
    varying highp vec2 vTextureCoord;
    varying highp vec3 vFragPos;
    varying highp vec3 vNormal;
    /*
    normal,position以及摄像机位置需要使用three.js内置参数
    */

    void main(void) {

      vFragPos = position;
      vNormal = normal;
      gl_Position = projectionMatrix * modelViewMatrix * vec4(position, 1.0);
      vTextureCoord = uv;

    }


</script>

  <script id="fragmentShader" type="x-shader/x-fragment">
    #ifdef GL_ES
    precision mediump float;
    #endif
    uniform sampler2D uSampler;
    uniform vec3 uKd;
    uniform vec3 uKs;
    uniform vec3 lightPosition;
    uniform float uLightIntensity;
    uniform int uTextureSample;

    varying highp vec2 vTextureCoord;
    varying highp vec3 vFragPos;
    varying highp vec3 vNormal;

    void main(void) {
      vec3 color;
      if (uTextureSample == 1) {
        color = pow(texture2D(uSampler, vTextureCoord).rgb, vec3(2.2));
      } else {
        color = uKd;
      }


      vec3 ambient = 0.05 * color;

      vec3 lightDir = normalize(lightPosition - vFragPos);
      vec3 normal = normalize(vNormal);
      float diff = max(dot(lightDir, normal), 0.0);
      float light_atten_coff = uLightIntensity / length(lightPosition - vFragPos);
      vec3 diffuse =  diff * light_atten_coff * color;

      vec3 viewDir = normalize(cameraPosition - vFragPos);
      float spec = 0.0;
      vec3 reflectDir = reflect(-lightDir, normal);
      spec = pow (max(dot(viewDir, reflectDir), 0.0), 35.0);
      vec3 specular = uKs * light_atten_coff * spec;

      gl_FragColor = vec4(pow((ambient + diffuse + specular), vec3(1.0/2.2)), 1.0);
      //gl_FragColor = vec4(pow((diffuse), vec3(1.0/2.2)), 1.0);

      //gl_FragColor = vec4( color, 1.0 );
      //gl_FragColor = vec4(0.1);

    }


</script>


  <script>
    /**
     * 创建场景对象Scene
     */
    var scene = new THREE.Scene();

    /**
     * 光源设置
     */
    //点光源
    var point = new THREE.PointLight(0xffffff);
    point.position.set(400, 200, 300); //点光源位置
    scene.add(point); //点光源添加到场景中
    //环境光
    var ambient = new THREE.AmbientLight(0x888888);
    scene.add(ambient);
    /**
     * 相机设置
     */
    var width = window.innerWidth; //窗口宽度
    var height = window.innerHeight; //窗口高度
    var k = width / height; //窗口宽高比
    var s = 150; //三维场景显示范围控制系数,系数越大,显示的范围越大
    //创建相机对象
    var camera = new THREE.OrthographicCamera(-s * k, s * k, s, -s, 1, 1000);
    camera.position.set(200, 300, 200); //设置相机位置
    // camera.position.set(0, 0, 200); //设置相机位置
    camera.lookAt(scene.position); //设置相机方向(指向的场景对象)

    /**
     * 创建网格模型
     */
    // var geometry = new THREE.BoxGeometry(100, 100, 100); //立方体
    // var geometry = new THREE.PlaneGeometry(400, 400); //矩形平面
    var geometry = new THREE.SphereGeometry(100, 25, 25); //球体
    // TextureLoader创建一个纹理加载器对象,可以加载图片作为几何体纹理
    var textureLoader = new THREE.TextureLoader();
    // 加载纹理贴图
    var texture = textureLoader.load('./Earth.png');
    var material = new THREE.MeshPhongMaterial({
      map: texture, // 普通颜色纹理贴图
    }); //材质对象Material
    var mesh = new THREE.Mesh(geometry, material); //网格模型对象Mesh
    scene.add(mesh); //网格模型添加到场景中
    var uniforms;
    uniforms = {
      uSampler: {//采样的图片
        value: texture,
      },
      uTextureSample: {//采样选择 1为贴图 2为不带贴图
        value: 1
      },
      uKd: {
        value: new THREE.Vector3(0.05, 0.05, 0.05)//控制满反射系数
      },
      uKs: {
        value: new THREE.Vector3(0.5, 0.5, 0.5)//控制高光系数
      },
      lightPosition: {//光源位置
        value: point.position
      },
      uLightIntensity: {
        value: 1155.0//光照强度
      }
    };
    var material_raw = new THREE.ShaderMaterial({
      uniforms: uniforms,
      vertexShader: document.getElementById('vertexShader').textContent,
      fragmentShader: document.getElementById('fragmentShader').textContent,
    });

    var mesh_raw = new THREE.Mesh(geometry, material_raw);
    mesh_raw.position.x = (mesh.position.x + 100 * 2);
    mesh_raw.position.z = (mesh.position.z + 100 * 2);
    scene.add(mesh_raw);

    /**
     * 创建渲染器对象
     */
    var renderer = new THREE.WebGLRenderer();
    renderer.setSize(width, height); //设置渲染区域尺寸
    renderer.setClearColor(0xb9d3ff, 1); //设置背景颜色
    document.body.appendChild(renderer.domElement); //body元素中插入canvas对象

    // 渲染函数
    function render() {
      renderer.render(scene, camera); //执行渲染操作
      requestAnimationFrame(render); //请求再次执行渲染函数render,渲染下一帧
    }
    render();
    //创建控件对象  相机对象camera作为参数   控件可以监听鼠标的变化,改变相机对象的属性
    var controls = new THREE.OrbitControls(camera, renderer.domElement);
    //监听鼠标事件,触发渲染函数,更新canvas画布渲染效果
    // controls.addEventListener('change', render);
  </script>

</body>

</html>
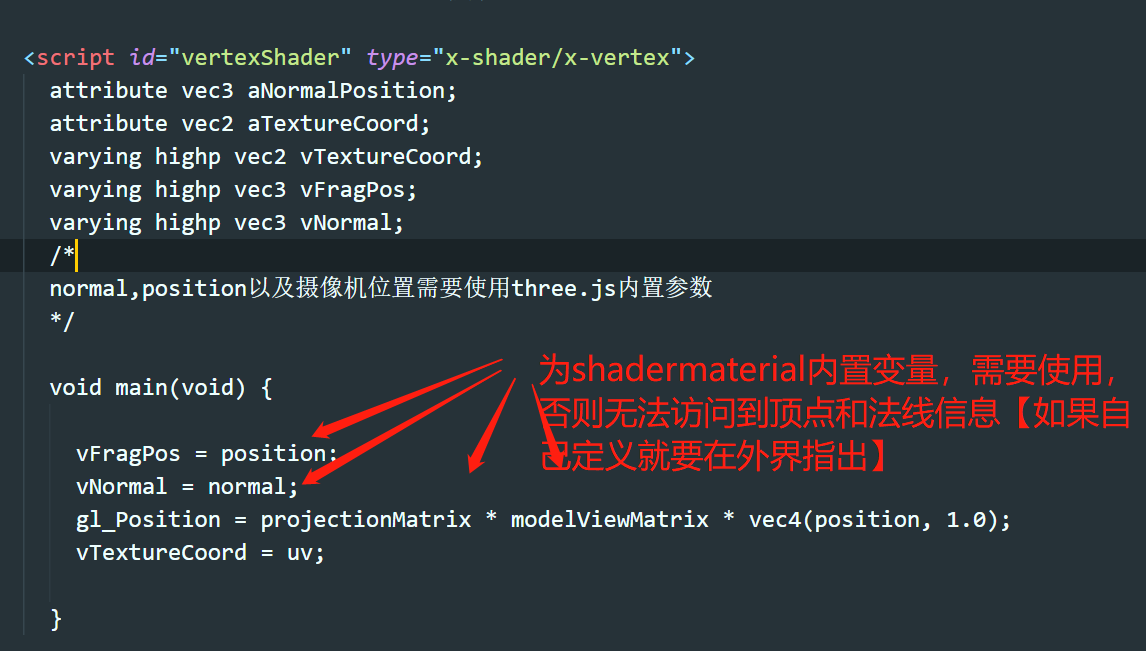
要注意的坑
uniform 传入的变量 和 顶点着色器 片元着色器 接受的变量
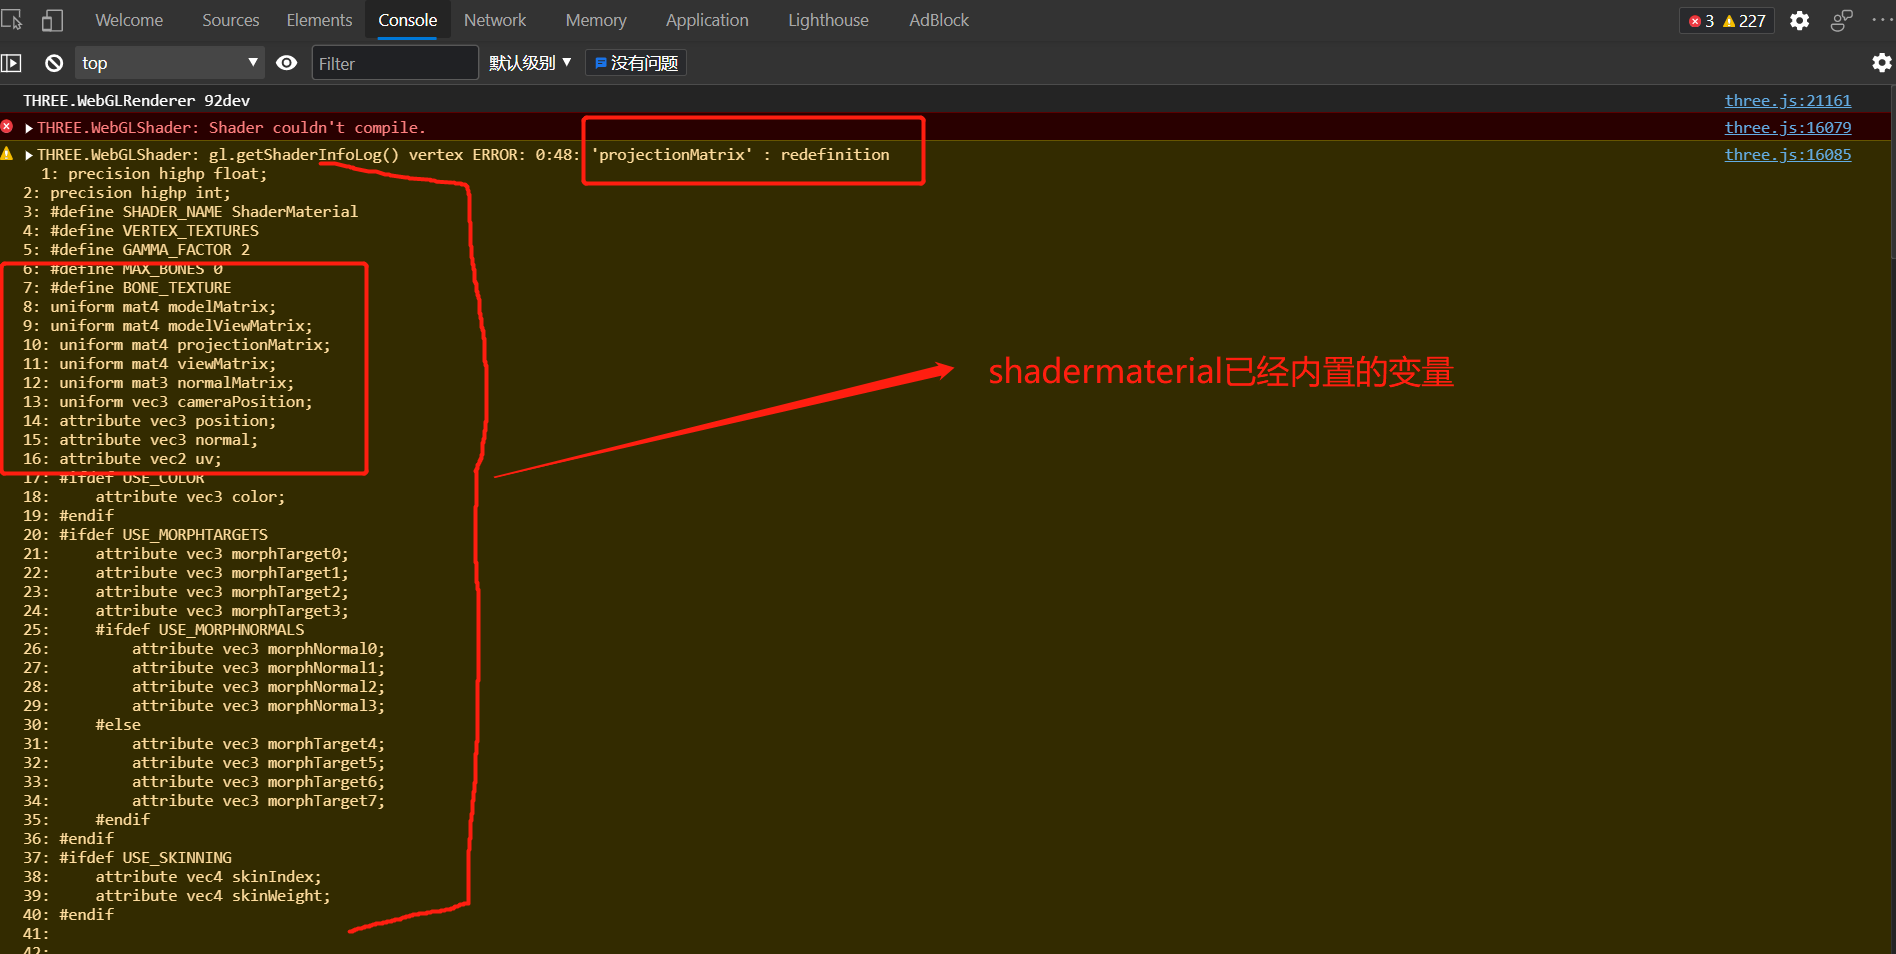
ShaderMaterial的vertexshader和fragmentshader是有默认变量的。【如果不想three.js有任何内置变量影响你的shader,那么请使用RawShaderMaterial】
这一点three.js文档里提到了但是没有指出默认变量是啥,最后利用浏览器F12调试工具发现
感悟
理解算法理论之后利用编程实现仍要考虑诸多问题,比如和api的接口,这次编写shader正因为接口不对顶点没有出进去所以一直绘制出现问题,当顶点、法线、光照方向、相机方向等考虑正确后算法才可以发挥效果